If you’re looking to experience the endless world of Android apps and games right from your PC, you’ve come to the right place! Bluestacks is one of the most popular Android emulators out there, and with Bluestacks 3, you can easily transform your Windows 7, 10, or 11 into a powerful Android gaming platform. Let’s dive into everything you need to know about downloading and using Bluestacks 3 for PC.
What is Bluestacks and How Does It Function as an Android Emulator?
Understanding the Bluestacks App Player
Bluestacks is essentially an Android emulator that allows you to run Android apps and games on your PC or Mac. It acts like a bridge between your Windows operating system and the Android environment, letting you enjoy mobile games on a bigger screen. The Bluestacks app player supports various versions of Android, making it versatile for different applications. When you use Bluestacks, you can easily download Android apps from the Google Play Store, just like you would on your Android device.
How Bluestacks Transforms Your PC into an Android Device
The magic of Bluestacks lies in its ability to mimic Android’s operating system, so you can play games and experience all the features of an Android device right from your computer. Once you install Bluestacks 3 for PC, it creates a virtual Android environment that allows you to run any compatible Android app. This means you can play Android games, use social media apps, and even run productivity tools straight from your desktop. It’s like having an Android device without ever leaving your PC!
Key Features of Bluestacks 3 for PC
Bluestacks 3 comes with a plethora of features designed to enhance your gaming experience. With a user-friendly interface, it allows for easy navigation and quick access to your favorite Android games and apps. You can also take advantage of the multi-instance feature, which lets you run multiple apps or games simultaneously. This is perfect for gamers who want to level up in two games at once or for those who want to manage social media accounts while playing. The performance is optimized for high FPS, ensuring that your gaming sessions are smooth and enjoyable.
How to Download and Install Bluestacks 3on Windows 7/10/11?
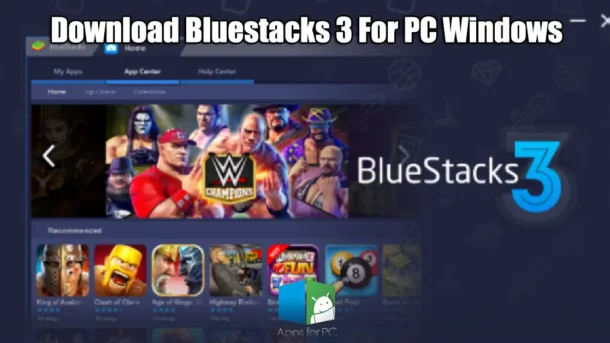
Step-by-Step Guide to Download Bluestacks 3
Getting started with Bluestacks3 is super simple! First, head over to the official Bluestacks website to download the latest version of the Bluestacks app player. You’ll want to make sure you’re getting the genuine software, as this will ensure a smooth installation process. Once on the site, click on the download button, and the installer will start downloading, usually as an .exe file. Just keep an eye on your downloads folder—it’ll be ready in no time!
Installation Process for Bluestacks on Your PC
After downloading Bluestacks, it’s time to install it. Locate the downloaded file in your downloads folder and double-click to start the installation. Follow the on-screen instructions—it’s pretty much a click-and-go process. Once the installation is complete, Bluestacks will launch automatically, and you’ll be prompted to log in with your Google account. This is essential for accessing the Google Play Store and downloading your favorite Android apps!
Troubleshooting Installation Issues
If you encounter any hiccups during the installation, don’t sweat it! First, ensure your PC meets the minimum system requirements for Bluestacks. If everything checks out but the installation still fails, try running the installer as an administrator. Sometimes, security settings can block the process. If you’re still having issues, check online forums for common problems or consult the Bluestacks support page for detailed troubleshooting tips.
Can I Play Android Games on PC Using Bluestacks 3?
How to Access Google Play Store on Bluestacks
Absolutely! One of the best features of using Bluestacks is that you can access the Google Play Store just like you would on an Android device. Once you’re logged in with your Google account, simply navigate to the Play Store within the Bluestacks interface. You can search for any Android game or app you wish to download, and with just a few clicks, you can have it installed and ready to go!
Installing and Running Android Games on Bluestacks
Installing Android games on Bluestacks is a breeze! After you’ve found your desired game in the Google Play Store, click the install button, and Bluestacks will take care of the rest in the latest version of Bluestacks. Once the game is installed, you can launch it directly from the Bluestacks home screen. The interface allows for seamless navigation, so you can switch between different apps and games effortlessly. It’s like having all your favorite mobile games at your fingertips!
Optimizing Performance for Playing Android Games on PC
To get the most out of your gaming experience, you might want to tweak some settings in Bluestacks. For starters, ensure your graphics settings are optimized for your PC’s specs. You can access these settings within the Bluestacks application and adjust them for better performance in the latest version of Bluestacks. Enabling the high-performance mode can significantly enhance your gaming experience, allowing for higher frame rates and smoother gameplay. Plus, don’t forget about the multi-instance feature—running multiple games can elevate your gaming fun to a whole new level!
What Are the System Requirements for Bluestacks 3 on PC?
Minimum and Recommended System Specifications
Before you download Bluestacks, it’s essential to ensure your PC meets the necessary system requirements. The minimum specifications typically include a Windows 7 or later OS, at least 4GB of RAM, and a processor that supports virtualization. However, to truly enjoy the full capabilities of Bluestacks, it’s recommended to have a more powerful setup—a modern processor, 8GB of RAM, and a decent graphics card can make a significant difference in performance.
How to Check if Your PC is Compatible with Bluestacks
Not sure if your PC can handle Bluestacks? It’s quite simple to check! You can right-click on ‘This PC’ and select ‘Properties’ to view your system specifications, including your RAM and processor details. Additionally, you can run a compatibility check on the Bluestacks website to see if your system is suited for the emulator. If you find that your specs fall short, consider upgrading your hardware for a better experience.
Importance of Graphics Card for Running Games on PC
Your graphics card plays a crucial role in running games smoothly on Bluestacks. A good graphics card can enhance visual performance and allow for higher FPS, which is particularly important for fast-paced games. If you’re serious about gaming on Bluestacks, investing in a dedicated graphics card can dramatically improve your overall gameplay experience, making those mobile games look stunning on your PC.
What Are the Advantages of Using Bluestacks 5 Over Previous Versions?
Comparing Bluestacks 5 with Bluestacks 3 and 2
While Bluestacks 3 is a fantastic emulator, Bluestacks 5 brings even more improvements to the table. The latest version focuses on optimizing performance and providing a more user-friendly interface. If you’re already familiar with Bluestacks 3, you’ll appreciate the enhancements in Bluestacks 5, such as quicker loading times and better overall stability. It’s a game-changer for those who want to play Android games on PC!
Performance Improvements in Bluestacks 5
Performance is where Bluestacks 5 truly shines. It offers substantial improvements in speed and efficiency, meaning you can expect less lag and smoother gameplay. The new version also manages system resources better, allowing you to run multiple instances without compromising performance. For gamers who thrive on quick reflexes, these enhancements mean a better experience overall.
New Features and Enhancements in Bluestacks 5
Bluestacks 5 introduces several new features that take your gaming experience to the next level. One notable feature is the ability to quickly switch between different game instances, which is perfect for players who want to juggle multiple games or accounts. Additionally, Bluestacks 5 introduces a new eco mode that optimizes resource usage, so you can enjoy longer gaming sessions without putting too much strain on your PC. It’s definitely worth making the switch to enjoy these benefits!
Faq’s
1. How to Install BlueStacks 3 on Windows 10?
To install BlueStacks 4 on Windows 10:
- Visit the official BlueStacks website and download the installer for BlueStacks 3.
- Run the installer file by double-clicking it.
- Follow the on-screen instructions to complete the installation.
- Once installed, launch BlueStacks 3, sign in with your Google account, and start using it.
Make sure your PC meets the minimum system requirements, including at least 2 GB of RAM, a decent graphics card, and an updated version of Windows 11.
2. How to Add an OBB File in BlueStacks 3?
To add an OBB file to BlueStacks 3:
- Open BlueStacks and navigate to the Media Manager.
- Drag and drop the OBB file from your PC into BlueStacks.
- Use a file explorer app within BlueStacks (e.g., ES File Explorer) to move the OBB file to the Android/OBB folder.
- Ensure the OBB file is placed in the folder corresponding to the app it belongs to.
If you face issues, verify the file path and permissions.
3. How to Run BlueStacks 3 Smoothly?
To enhance BlueStacks 3 performance:
- Increase RAM and CPU allocation: Go to Settings > Engine and allocate more resources.
- Enable virtualization in your BIOS settings.
- Close background applications on your PC to free up memory.
- Use the latest version of your graphics drivers.
- Set BlueStacks to run on High Performance mode in your PC’s power settings.
These tweaks will optimize performance for smooth gameplay and app usage.
4. How to Use BlueStacks 3 Without Google Login?
You can bypass the Google login process by using Bluestacks X:
- Clicking on “Skip” during the initial setup when prompted to log in.
- Downloading APK files directly to your PC and sideloading them into BlueStacks using the Install APK option.
- However, note that certain features, like accessing the Play Store, will not work without a Google account.
This method is suitable for users who want privacy or don’t need Google services.
5. How to Install an APK in BlueStacks 3?
To install an APK in BlueStacks 3:
- Download the APK file on your PC.
- Open BlueStacks and click the Install APK button (usually at the bottom or in the sidebar).
- Locate the APK file on your PC and select it.
- BlueStacks will install the app, and it will appear on the home screen.
Ensure the APK file is from a trusted source to avoid security risks.
6. How to Speed Up BlueStacks 3 on Windows 7?
To make BlueStacks 3 run faster on Windows 7:
- Enable virtualization in the BIOS for better performance.
- Increase the CPU and RAM allocation in BlueStacks’ settings (go to Settings > Engine).
- Switch to a lower-resolution display mode in the Engine settings.
- Update your graphics drivers to the latest version.
- Close unnecessary background processes and free up system resources.
- Use an SSD instead of an HDD for faster data access.
These steps can significantly improve the speed of BlueStacks 3 on older systems like Windows 7.
7. How to Change Screen Orientation in BlueStacks 3?
To change the screen orientation in BlueStacks 3:
- Open BlueStacks and launch the app you want to use.
- Press Ctrl + Shift + 4 (to switch to portrait mode) or Ctrl + Shift + 5 (to switch to landscape mode).
- Alternatively, some apps have an in-app orientation option.
You can also adjust orientation through BlueStacks settings under the “Display” tab for default preferences.
8. How to Play PUBG in BlueStacks 3?
To play PUBG in BlueStacks 3:
- Install BlueStacks 3 and sign in with your Google account.
- Open the Google Play Store and search for PUBG Mobile.
- Install the game and open it within BlueStacks.
- Configure the controls by clicking on the Keyboard icon in the side toolbar to map the keys.
- Start playing using your PC’s keyboard and mouse for better precision.
Make sure your system meets PUBG’s requirements for smooth gameplay and can handle cloud gaming.
9. How to Transfer Files from PC to BlueStacks 3?
To transfer files:
- Open BlueStacks and go to the Media Manager from the home screen of Bluestacks by now.gg.
- Drag and drop files from your PC into the Media Manager.
- Access the files in BlueStacks through the Media Manager or use a file explorer app.
- For APK files, use the Install APK button to directly install the app.
This method works for images, documents, APKs, and other file types.
10. How to Back Up BlueStacks 3 Data?
To back up your BlueStacks 3 data:
- Open BlueStacks and go to Settings.
- Navigate to the Backup & Restore section.
- Choose the backup option and select the data to back up.
- Save the backup file on your PC for future use.
You can restore the data later using the same menu in case of reinstallation or device migration.
1. How to Play Pokémon GO in BlueStacks 3?
To play Pokémon GO on BlueStacks 3:
- Install BlueStacks 3 and log in with your Google account.
- Search for Pokémon GO in the Google Play Store and download BlueStacks App Player.
- Use apps like Fake GPS Location to simulate movement (available in the Play Store).
- Enable developer mode and mock location on BlueStacks to set up GPS spoofing.
- Launch Pokémon GO and start playing, ensuring the GPS settings match your desired location.
Note: GPS spoofing may violate Pokémon GO’s terms of service, so proceed with caution.
12. How to Root BlueStacks 3 on Windows 7?
To root BlueStacks 3:
- Download a rooting tool like BSTweaker (BlueStacks Tweaker).
- Close BlueStacks completely, including all background services.
- Open BSTweaker and select the option to root BlueStacks.
- Restart BlueStacks after rooting is complete.
- Verify the root status using apps like Root Checker from the Play Store.
Rooting BlueStacks allows advanced customizations but may void its warranty and cause stability issues.
13. How to Copy Files from Windows to BlueStacks 3?
To copy files from Windows 11 to BlueStacks 4:
- Open BlueStacks and go to the Media Manager.
- Drag and drop files from your PC into the Media Manager window.
- Access the files using apps like a file explorer within BlueStacks.
- Alternatively, use cloud storage apps like Google Drive to upload and download files.
This process works for transferring documents, images, and other file types efficiently.
14. How to Install OBB in BlueStacks 3?
To install OBB files:
- Open BlueStacks and drag the OBB file from your PC into the emulator.
- Use a file explorer app to locate the OBB file in BlueStacks.
- Move the file to the Bluestacks 4 folder. Android/OBB folder corresponding to the app.
- Launch the app associated with the OBB file to check if it works correctly.
Ensure the OBB file is correctly paired with its APK for seamless functionality.
15. How to Download Real Racing 3 on PC Without BlueStacks?
To play Real Racing 3 without BlueStacks:
- Use alternative emulators like Nox Player or LDPlayer to install and run the game.
- For a more direct solution, check if the game is available as a Windows-compatible version on platforms like Microsoft Store or Steam.
- Another option is to use remote desktop software to stream the game from your mobile device to your PC.
This method provides an alternative for users who prefer not to use BlueStacks.